
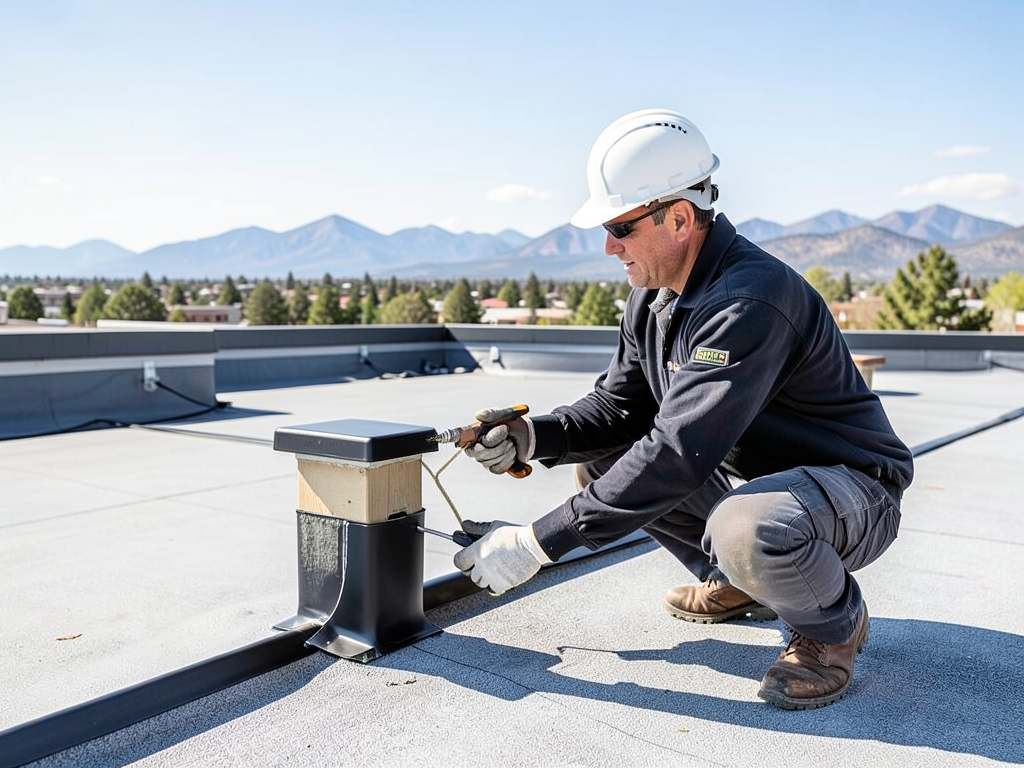
Why Roof Deck Railing Installation in Sloan’s Lake Requires Special Attention
Installing a railing on your Sloan’s Lake roof deck sounds simple until you realize that every post penetration creates a potential leak point. Denver’s extreme freeze-thaw cycles and intense UV exposure make waterproofing these connections critical. A single failed seal can cause thousands in water damage to your ceiling below. Roofing Sheridan.
The challenge goes beyond basic carpentry. You need to understand how your specific roofing membrane reacts to penetration, what Denver building codes require for lateral load resistance, and which flashing methods actually hold up against our harsh climate. Most DIY installations fail because they skip the technical details that separate a leak-free deck from a water-damaged ceiling. EPA Green Homes.
This guide walks you through the exact process used by Denver roofing professionals. You will learn which mounting systems work best for TPO, EPDM, and PVC membranes, how to flash posts without voiding your roof warranty, and what local codes require for structural integrity. By the end, you will know whether this is a weekend project or a job for a licensed contractor. Roofing Englewood.
Understanding Your Sloan’s Lake Roof Deck Structure
Sloan’s Lake homes typically feature either built-up tar and gravel systems or single-ply membranes like TPO or EPDM. These materials respond differently to post attachments. TPO and PVC membranes require heat-welded flashings while EPDM needs adhesive-compatible patches. The wrong approach can delaminate your roofing material.
Denver’s building code requires guardrails on decks higher than 30 inches from the ground. For roof decks, this means posts must resist 200 pounds of lateral force. This requirement drives your mounting method choice. Surface mounts need reinforced blocking while fascia mounts transfer load differently.
Local climate factors compound the challenge. UV rays degrade sealants within 3-5 years. Freeze-thaw cycles cause expansion joints to fail. Snow loads in winter add vertical pressure that can warp poorly supported posts. Your flashing system must accommodate all three stressors.
Mounting Systems Compared for Denver Roof Decks
Four main mounting approaches exist for roof deck railings. Each has specific advantages for Denver’s climate and building requirements.
| Mounting Type | Best For | Waterproofing Complexity | Structural Requirements |
|---|---|---|---|
| Surface Mount | TPO/PVC membranes | High – requires heat welding | Blocking between joists |
| Fascia Mount | Wood decks with fascia boards | Medium – flashing needed | Engineered fascia support |
| Curb Mount | Flat roof conversions | Low – perimeter attachment | Raised curb construction |
| Post Sleeve | All membrane types | Medium – compression seal | Deck penetration allowed |
Surface mounts work well for heat-weldable membranes but require access to structural blocking. Fascia mounts avoid roof penetration but need engineered support to handle Denver’s snow loads. Curb mounts create a raised perimeter but add cost and complexity. Post sleeves offer the simplest waterproofing but penetrate the roof deck.
Your choice depends on your existing roof structure and local code requirements. Sloan’s Lake homes built after 2010 often have engineered roof decks designed for rooftop decks, making surface mounts more feasible.
Material Compatibility and Flashing Techniques
Each roofing membrane type demands specific flashing materials and installation methods. Using incompatible products voids warranties and guarantees leaks. Fixing Flat Roof Leaks in LoHi and Modern Denver Homes.
| Membrane Type | Compatible Flashing | Sealant Requirements | Denver Climate Considerations |
|---|---|---|---|
| TPO | Heat-welded TPO boots | None – welded seam | Requires professional heat gun |
| EPDM | Rubber boot with adhesive | Neoprene-based sealant | UV resistance critical |
| PVC | Heat-welded PVC boots | None – welded seam | Similar to TPO process |
| Modified Bitumen | Bitumen flashing | Asphalt-based sealant | Heat application needed |
TPO and PVC installations require specialized heat welding equipment. The flashing boot must be welded to the membrane creating a monolithic seal. This process demands professional training and cannot be DIY. EPDM installations use adhesive-backed boots that bond to the rubber surface. The adhesive must be specifically formulated for EPDM to prevent chemical degradation.
Modified bitumen systems can use heat welding or cold-applied adhesives depending on the specific product. Always verify compatibility with your roofing manufacturer before selecting flashing components.
Step-by-Step: The Anatomy of a Leak-Proof Railing Attachment
A properly installed roof deck railing system consists of multiple components working together to prevent water intrusion. Missing any element creates a failure point.
- Structural Planning
Locate structural blocking between roof joists. Mark post locations ensuring they align with blocking for proper load transfer. Verify blocking spans at least 6 inches beyond each post base.
- Membrane Preparation
Clean the membrane surface around each post location. Remove all debris and contaminants. For TPO/PVC, lightly abrade the surface if required by manufacturer specifications.
- Flashing Boot Installation
Install the appropriate flashing boot for your membrane type. For heat-weldable membranes, this requires professional equipment. For EPDM, apply adhesive per manufacturer instructions and allow proper cure time.
- Base Plate Attachment
Secure the base plate to structural blocking using stainless steel lag bolts. Apply sealant under the base plate perimeter before final tightening. Torque bolts to manufacturer specifications.
- Compression Seal
Install rubber gaskets or compression seals around post bases. These create the final waterproof barrier and accommodate thermal expansion.
- Post Installation
Set posts into base plates. Verify plumb alignment and secure with manufacturer-provided hardware. Check for any movement or wobble.
- Final Sealant Application
Apply UV-resistant sealant around all visible gaps. For TPO/PVC, heat weld any exposed membrane edges if required.
Each step builds upon the previous one. Rushing or skipping steps guarantees failure. The compression seal stage proves most critical for long-term performance. This component must accommodate the 30-40 degree temperature swings common in Denver.
Denver Building Code Requirements for Roof Deck Railings
Denver follows the International Residential Code with local amendments. For roof decks, several specific requirements apply to railing installations.
Guardrail height must be at least 36 inches for residential applications. Commercial properties require 42 inches. The top rail must withstand 200 pounds of horizontal force applied anywhere along its length. This requirement drives structural design decisions.
Post spacing cannot exceed 6 feet on center for 36-inch railings. Closer spacing provides better load distribution and reduces deflection. For Sloan’s Lake homes with panoramic views, many homeowners opt for 4-foot spacing despite the added cost.
Building permits are required for all railing installations on roof decks. The permit process includes structural engineering review for posts penetrating roof membranes. Skipping permits risks fines and insurance complications if water damage occurs.
Local amendments address Denver’s specific climate. Ice and water shield requirements extend beyond standard practices. Flashing details must accommodate rapid freeze-thaw cycles. Inspectors check for these details during final inspections.
Common Failure Points and How to Avoid Them
Understanding where installations typically fail helps you prevent problems before they start. Most failures follow predictable patterns based on material choices and installation shortcuts.
UV degradation ranks as the most common failure mode. Standard silicone sealants break down under Denver’s intense sunlight within 3-5 years. Use only UV-resistant polyurethane or silicone formulations rated for Colorado conditions. Check product specifications for UV stability ratings.
Thermal expansion causes fittings to loosen over time. Materials expand and contract at different rates. Your flashing system must accommodate these movements without breaking seals. Compression gaskets and flexible sealants provide this accommodation.
Improper blocking leads to post movement and seal failure. Posts need solid backing to resist lateral loads. Hollow-core construction or inadequate blocking creates weak points. Verify structural support before starting any installation.
Membrane incompatibility causes delamination. Using the wrong flashing materials with your specific membrane type creates chemical reactions that destroy waterproofing. Always verify compatibility with both membrane and flashing manufacturers.
Maintenance and Inspection Schedule
Even properly installed systems require periodic inspection. Denver’s climate accelerates wear patterns that might take decades in milder regions. Establish a regular inspection schedule to catch problems early.
Spring inspection should occur after the last freeze. Check all sealant joints for cracking or separation. Look for water stains on ceilings below deck areas. Test post stability by applying moderate lateral force.
Summer inspection focuses on UV damage. Check all exposed sealant surfaces for chalking or deterioration. Verify flashing boots remain properly adhered to membranes. Look for any signs of membrane shrinkage or pulling away from flashings.
Fall inspection prepares for winter snow loads. Verify all post connections remain tight. Check for any signs of corrosion on metal components. Ensure drainage paths remain clear to prevent ice dam formation.
Winter monitoring involves watching for ice buildup around post bases. Ice expansion can force seals apart. Remove excessive snow accumulation to reduce weight stress on railing connections.
Professional inspection every 3-5 years catches developing problems before major damage occurs. Many Denver roofing contractors offer maintenance agreements specifically for roof deck installations.
When to Call a Professional
Several scenarios indicate professional installation becomes necessary. Recognizing these situations prevents costly mistakes and protects your home investment.
Heat-weldable membrane installations require professional equipment and certification. The specialized heat guns and welding techniques cannot be rented or learned through online tutorials. Attempting DIY heat welding often destroys expensive membrane materials.
Complex structural modifications need engineering review. Adding blocking between existing roof joists, modifying load paths, or installing heavy glass railing systems requires structural engineering approval. Local building departments mandate this review for safety.
Warranty preservation demands professional installation. Most roofing manufacturers void warranties if unauthorized penetrations occur. Professional installers carry liability insurance and provide warranty documentation for their work.
Time constraints favor professional installation. A typical DIY installation takes 3-4 weekends for an experienced homeowner. Professionals complete the same work in 1-2 days with proper materials and tools. This efficiency often offsets labor costs.
Denver’s building permit process involves detailed drawings and inspections. Professional installers handle permitting, scheduling inspections, and ensuring code compliance. This administrative burden overwhelms most DIY homeowners.
Cost Factors for Professional Installation
Professional installation costs vary based on several factors specific to Sloan’s Lake homes and Denver market conditions. Understanding these variables helps you budget accurately.
Membrane type significantly impacts cost. TPO and PVC installations require heat welding, adding $15-25 per linear foot compared to EPDM adhesive installations. Modified bitumen costs fall between these extremes depending on the specific product.
Post spacing affects both material and labor costs. 4-foot spacing requires 50% more posts than 6-foot spacing. Each additional post adds flashing boot costs and installation time. Glass railing systems multiply these costs further.
Access difficulty increases labor costs. Second-story installations or homes with limited roof access require additional safety equipment and setup time. Steep roof pitches or complex roof geometries add complexity and cost.
Permit and inspection fees vary by project scope. Simple installations might cost $200-300 in permits while complex projects with structural modifications can exceed $1,000 in fees. Professional installers typically bundle these costs into their quotes.
Seasonal timing affects availability and pricing. Spring and fall represent peak demand periods with higher prices and longer wait times. Winter installations might offer discounts but face weather-related delays.
Frequently Asked Questions
Can I install a roof deck railing myself without causing leaks?
DIY installation works for simple wood decks with proper flashing techniques. However, heat-weldable membranes and complex structural modifications require professional expertise. Most DIY failures occur from using incorrect materials or skipping critical flashing steps.
How long should a properly installed roof deck railing last?
Quality installations last 15-20 years with proper maintenance. UV-resistant components and professional heat welding extend lifespan. Most failures occur within the first 5 years from installation errors or material degradation.
Will installing a railing void my roof warranty?
Unauthorized penetrations typically void roofing warranties. Professional installation with manufacturer-approved flashing methods preserves warranties. Always verify compatibility with your roofing manufacturer before starting any project.
What’s the best mounting system for Denver’s climate?
Surface mounts with heat-welded flashings provide the most reliable waterproofing for Denver’s extreme weather. Fascia mounts work for wood decks but require engineered support for snow loads. Post sleeves offer simplicity but need proper compression seals. Reliable Gutter Installation for New Builds in Central Park.
How much does professional installation cost in Sloan’s Lake?
Professional installation ranges from $3,000-8,000 depending on deck size, railing material, and membrane type. Heat-welded TPO installations cost more than adhesive EPDM systems. Glass railings can double these costs.
Protect Your Sloan’s Lake Investment
Your roof deck represents a significant home improvement investment. Proper railing installation protects that investment from water damage while providing safe outdoor living space. The technical details matter more than most homeowners realize.
Denver’s climate creates unique challenges that generic installation guides cannot address. UV exposure, freeze-thaw cycles, and snow loads demand specific materials and techniques. Cutting corners today means expensive repairs tomorrow.
Whether you choose DIY or professional installation, understanding these principles helps you make informed decisions. Ask contractors about their flashing methods, membrane compatibility, and warranty coverage. Verify they understand Denver’s specific building requirements.
For most Sloan’s Lake homeowners, professional installation provides the best balance of cost, reliability, and warranty protection. The peace of mind from a properly installed, leak-free railing system proves worth the investment. For more information, visit FEMA Building Codes.
Ready to upgrade your roof deck with confidence? Contact Apex Roofing Denver at (720) 484-8300 for a free consultation. Our Denver-based team understands exactly what your Sloan’s Lake home needs to stay dry and beautiful for years to come.
{
“@context”: “https://schema.org”,
“@type”: “BlogPosting”,
“headline”: “How to Install a Roof Deck Railing on Your Sloan’s Lake Home Without Causing a Major Leak”,
“description”: “Learn the exact steps to waterproof your roof deck railing installation in Sloan’s Lake. Prevent costly leaks with Denver-specific flashing techniques and membrane compatibility.”,
“wordCount”: 2181,
“datePublished”: “2026-06-20T06:10:00.000Z”,
“dateModified”: “2026-06-20T06:10:00.000Z”,
“inLanguage”: “en-US”,
“mainEntityOfPage”: {
“@type”: “WebPage”,
“@id”: “https://apexroofingdenver.com”
},
“publisher”: {
“@type”: “LocalBusiness”,
“name”: “Apex Roofing Denver”,
“url”: “https://apexroofingdenver.com”
},
“author”: {
“@type”: “Organization”,
“name”: “Apex Roofing Denver”,
“url”: “https://apexroofingdenver.com”
},
“image”: {
“@type”: “ImageObject”,
“url”: “https://apexroofingdenver.com/wp-content/uploads/2026/03/how-to-install-a-roof-deck-railing-on-your-sloan-s-1.png”
}
}
{
“@context”: “https://schema.org”,
“@type”: “RoofingContractor”,
“name”: “Apex Roofing Denver”,
“url”: “https://apexroofingdenver.com”,
“address”: {
“@type”: “PostalAddress”,
“addressLocality”: “Denver”
},
“areaServed”: {
“@type”: “City”,
“name”: “Denver”
}
}
{
“@context”: “https://schema.org”,
“@type”: “FAQPage”,
“mainEntity”: [
{
“@type”: “Question”,
“name”: “Can I install a roof deck railing myself without causing leaks?”,
“acceptedAnswer”: {
“@type”: “Answer”,
“text”: “DIY installation works for simple wood decks with proper flashing techniques. However, heat-weldable membranes and complex structural modifications require professional expertise. Most DIY failures occur from using incorrect materials or skipping critical flashing steps.”
}
},
{
“@type”: “Question”,
“name”: “How long should a properly installed roof deck railing last?”,
“acceptedAnswer”: {
“@type”: “Answer”,
“text”: “Quality installations last 15-20 years with proper maintenance. UV-resistant components and professional heat welding extend lifespan. Most failures occur within the first 5 years from installation errors or material degradation.”
}
},
{
“@type”: “Question”,
“name”: “Will installing a railing void my roof warranty?”,
“acceptedAnswer”: {
“@type”: “Answer”,
“text”: “Unauthorized penetrations typically void roofing warranties. Professional installation with manufacturer-approved flashing methods preserves warranties. Always verify compatibility with your roofing manufacturer before starting any project.”
}
},
{
“@type”: “Question”,
“name”: “What’s the best mounting system for Denver’s climate?”,
“acceptedAnswer”: {
“@type”: “Answer”,
“text”: “Surface mounts with heat-welded flashings provide the most reliable waterproofing for Denver’s extreme weather. Fascia mounts work for wood decks but require engineered support for snow loads. Post sleeves offer simplicity but need proper compression seals. Reliable Gutter Installation for New Builds in Central Park.”
}
},
{
“@type”: “Question”,
“name”: “How much does professional installation cost in Sloan’s Lake?”,
“acceptedAnswer”: {
“@type”: “Answer”,
“text”: “Professional installation ranges from $3,000-8,000 depending on deck size, railing material, and membrane type. Heat-welded TPO installations cost more than adhesive EPDM systems. Glass railings can double these costs.”
}
}
]
}
{
“@context”: “https://schema.org”,
“@type”: “HowTo”,
“name”: “How to Install a Leak-Proof Roof Deck Railing”,
“step”: [
{
“@type”: “HowToStep”,
“position”: 1,
“name”: “Structural Planning”,
“text”: “Locate structural blocking between roof joists. Mark post locations ensuring they align with blocking for proper load transfer. Verify blocking spans at least 6 inches beyond each post base.”
},
{
“@type”: “HowToStep”,
“position”: 2,
“name”: “Membrane Preparation”,
“text”: “Clean the membrane surface around each post location. Remove all debris and contaminants. For TPO/PVC, lightly abrade the surface if required by manufacturer specifications.”
},
{
“@type”: “HowToStep”,
“position”: 3,
“name”: “Flashing Boot Installation”,
“text”: “Install the appropriate flashing boot for your membrane type. For heat-weldable membranes, this requires professional equipment. For EPDM, apply adhesive per manufacturer instructions and allow proper cure time.”
},
{
“@type”: “HowToStep”,
“position”: 4,
“name”: “Base Plate Attachment”,
“text”: “Secure the base plate to structural blocking using stainless steel lag bolts. Apply sealant under the base plate perimeter before final tightening. Torque bolts to manufacturer specifications.”
},
{
“@type”: “HowToStep”,
“position”: 5,
“name”: “Compression Seal”,
“text”: “Install rubber gaskets or compression seals around post bases. These create the final waterproof barrier and accommodate thermal expansion.”
},
{
“@type”: “HowToStep”,
“position”: 6,
“name”: “Post Installation”,
“text”: “Set posts into base plates. Verify plumb alignment and secure with manufacturer-provided hardware. Check for any movement or wobble.”
},
{
“@type”: “HowToStep”,
“position”: 7,
“name”: “Final Sealant Application”,
“text”: “Apply UV-resistant sealant around all visible gaps. For TPO/PVC, heat weld any exposed membrane edges if required.”
}
],
“image”: “https://apexroofingdenver.com/wp-content/uploads/2026/03/how-to-install-a-roof-deck-railing-on-your-sloan-s-1.png”
}
{
“@context”: “https://schema.org”,
“@type”: “BreadcrumbList”,
“itemListElement”: [
{
“@type”: “ListItem”,
“position”: 1,
“name”: “Home”,
“item”: “https://apexroofingdenver.com”
},
{
“@type”: “ListItem”,
“position”: 2,
“name”: “Blog”,
“item”: “https://apexroofingdenver.com/blog”
},
{
“@type”: “ListItem”,
“position”: 3,
“name”: “How to Install a Roof Deck Railing on Your Sloan’s Lake Home Without Causing a Major Leak”
}
]
}
{
“@context”: “https://schema.org”,
“@type”: “Service”,
“serviceType”: “Roofing”,
“provider”: {
“@type”: “LocalBusiness”,
“name”: “Apex Roofing Denver”,
“url”: “https://apexroofingdenver.com”
},
“areaServed”: {
“@type”: “City”,
“name”: “Denver”
},
“description”: “Learn the exact steps to waterproof your roof deck railing installation in Sloan’s Lake. Prevent costly leaks with Denver-specific flashing techniques and membrane compatibility.”
}